

Installation#
Requirements#
idtracker.ai is a Python package available on PyPI, fully compatible with Windows, Linux, and macOS.
For high-accuracy identity tracking, the software uses machine learning powered by PyTorch. A dedicated GPU is highly recommended — either an NVIDIA or AMD GPU (4 GB of VRAM or more) or an Apple M-series chip (AMD GPU requires macOS 12.3 or later). If your machine lacks a compatible graphics device, you can still use specific utility tools; see Install without a graphics device.
idtracker.ai is a resource-intensive software
We recommend using an overall moderately equipped computer: 12 GB of RAM (or more for high-resolution long videos) and a powerful multi-core CPU (i5/Ryzen 5 or better).
Check Nvidia drivers#
Do not install Nvidia drivers if you don’t have Nvidia hardware!
This section applies only to users with an NVIDIA GPU.
CPU-only users: skip to Install without a graphics device.
Apple and AMD users: skip this section and pay special attention to step 3 of Install idtracker.ai for the correct PyTorch installation command.
If you want idtracker.ai to run on Nvidia hardware, make sure to have a compatible CUDA version (>= 11.7). Check your current NVIDIA drivers installation by opening a terminal (Anaconda prompt on Windows) and typing:
nvidia-smi
to get an output similar to this:
nvidia-smi output#+-----------------------------------------------------------------------------+
| NVIDIA-SMI 535.183.01 Driver Version: 535.183.01 CUDA Version: 12.2 |
|-------------------------------+----------------------+----------------------+
| GPU Name Persistence-M| Bus-Id Disp.A | Volatile Uncorr. ECC |
| Fan Temp Perf Pwr:Usage/Cap| Memory-Usage | GPU-Util Compute M. |
| | | MIG M. |
|===============================+======================+======================|
| 0 NVIDIA GeForce ... Off | 00000000:01:00.0 Off | N/A |
| N/A 60C P0 N/A / 35W | 5MiB / 4096MiB | 0% Default |
| | | N/A |
+-------------------------------+----------------------+----------------------+
| Processes: |
| GPU GI CI PID Type Process name GPU Memory |
| ID ID Usage |
|=============================================================================|
| 0 N/A N/A 2186 G /usr/lib/xorg/Xorg 4MiB |
+-----------------------------------------------------------------------------+
Check your CUDA version in the “CUDA Version:” section. If it is equal to or higher than 11.7, you can proceed to the next installation step, Check Conda environments.
If your CUDA version is lower than 11.7 (or you don’t get the nvidia-smi output at all), you need to update (or install) the Nvidia drivers on your machine.
Tip
As a rule of thumb, avoid manually installing critical drivers like Nvidia’s ones. Let your operating system update them automatically.
Give Windows a chance to install drivers by its own by running a general update with Windows Update, you can run it with the command
control update
This command will launch a graphical application, check for updates there and install. Reboot when prompted.
If the nvidia-smi output stays the same, open Nvidia’s application GeForce Experience (or install it from their website).
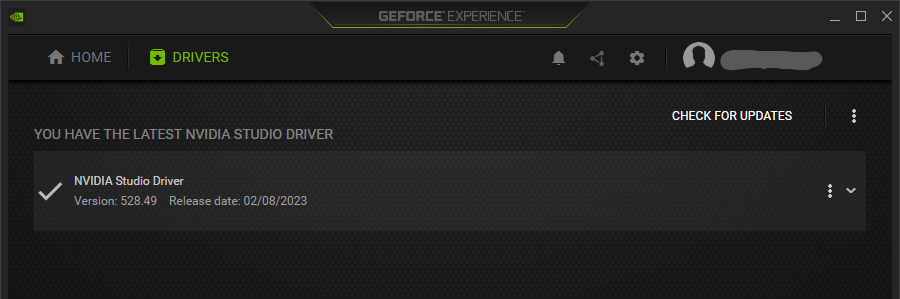
Nvidia’s GeForce Experience application#
In the tab DRIVERS, click CHECK FOR UPDATES. Update your drivers and reboot when asked. If everything else fails, you can still try to manually install drivers from the Nvidia website.
Give Ubuntu a chance to install drivers by its own by running a general update with:
sudo apt update
sudo apt upgrade
and reboot if asked.
If the nvidia-smi output stays the same, open Ubuntu’s application Software & Updates (if you don’t find it on your applications, you can launch it running the command software-properties-gtk)
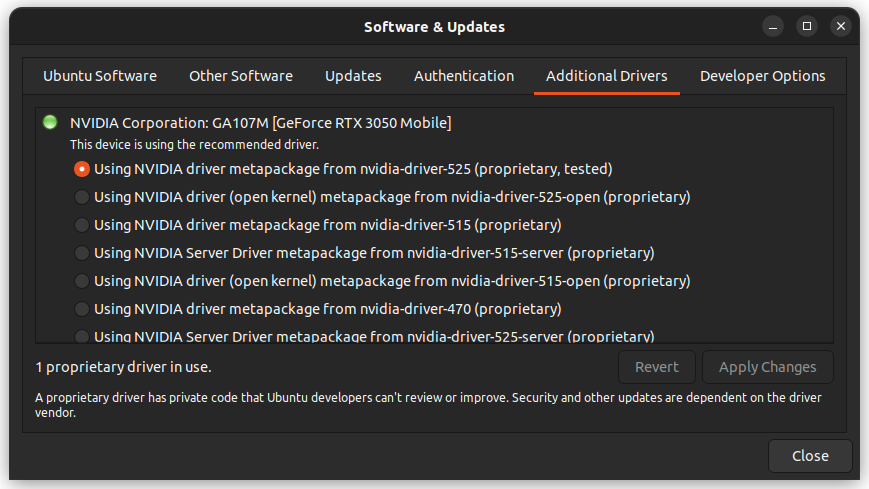
Ubuntu’s Software & Updates application#
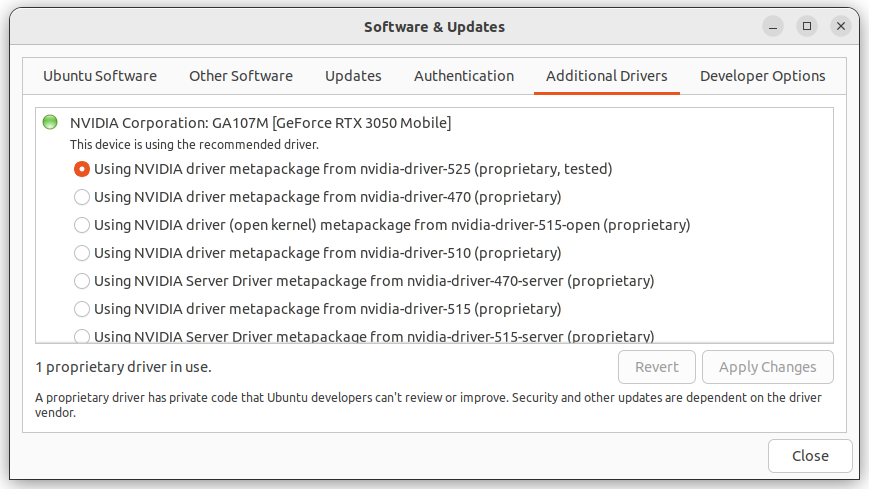
Ubuntu’s Software & Updates application#
In the tab Additional Drivers, select the NVIDIA driver (proprietary, tested) and click Apply Changes. Wait for the installation to finish and reboot when prompted.
Check Conda environments#
While it is not required, we recommend installing idtracker.ai inside a Conda environment. You can check if you have a Conda installation by running
conda
If you get something like conda: command not found, you do not have Conda installed. Install it by downloading Miniconda (or Anaconda) from the official website, or follow their guide. If you are unsure which to choose, we recommend Miniconda — it is the minimal Conda installation.
Warning
Mac users should pay special attention to the Anaconda/Miniconda installation options. Users with M-series chips should choose Apple silicon, not Intel chip.
Install idtracker.ai#
Assuming you have your drivers ready and Miniconda (or Anaconda) on your system, idtracker.ai can be now installed by following the commands below (to be run in a Linux terminal or in an Anaconda Prompt in Windows):
Create a Conda environment called idtrackerai with Python 3.13 (Python 3.10-3.13 are supported). You can change the environment name if desired:
conda create -n idtrackerai python=3.13
Activate the environment:
conda activate idtrackerai
Go to PyTorch site to get the command to install Pytorch and Torchvision with the parameters Pytorch Build: Stable, your operating system, Package: Pip, Language: Python and your compute platform (for NVIDIA GPUs select the highest CUDA version, for AMD select ROCm, and CPU if your computer doesn’t have any graphics device). For example, the command for a Linux system with an NVIDIA GPU might look like this:
pip3 install torch torchvision --index-url https://download.pytorch.org/whl/...
Warning
The command above depends on your computer specifications, don’t copy-paste it, visit PyTorch site.
Install idtracker.ai from PyPI:
pip install idtrackerai
Tip
Check our Installation Troubleshooting page if this step raises an error.
If you are unfamiliar with Conda environments, they are isolated environments that allow you to manage dependencies and packages for different projects separately. This means you can have different versions of packages and Python itself for different projects without conflicts. Keep in mind that idtracker.ai has been installed inside a Conda environment. As long as the environment is inactive, your computer will have no idea about any idtrackerai installation. To run any idtracker.ai command in the future, you will first have to activate the environment with:
conda activate idtrackerai
Test the installation#
Open a terminal (Anaconda Prompt in Windows) and activate the Conda environment where your idtracker.ai installation is:
conda activate idtrackerai
Test your idtracker.ai installation by running:
idtrackerai_test
This command will copy an 18-second test video called test_B.avi into your current working directory. idtracker.ai will then track it and generate the respective session_test output folder.
With GPU acceleration, the test takes 1 to 6 minutes. Without it, it can take 10-50 minutes. At the end of the test, the console should display the following line:
INFO Test passed successfully in 00:??:?? with version 6.0.14
meaning a successful installation!
Check out our Installation Troubleshooting if this test raises some error .
See also
A high quality zebrafish video with its optimal segmentation parameters is available for users to test idtracker.ai’s capabilities on a more demanding situation:
name = 'testing_60zebrafish'
video_paths = ['zebrafish_60_1.avi']
intensity_ths = [0, 25]
area_ths = [80, 10000]
number_of_animals = 60
use_bkg = true
roi_list = [
    "+ Ellipse {'center': [1924, 1800], 'axes': [1769, 1789], 'angle': 101}",
]
Find a complete list of high quality videos, their optimal parameters and the resulting tracking results in our data repository:
Install without a graphics device#
The Segmentation app, the Validator, and the Video Generator do not require PyTorch and therefore do not need a dedicated graphics device. To use only these tools, follow steps 1, 2, and 4 of Install idtracker.ai — you can skip step 3 (the PyTorch installation).
This is useful when controlling a remote machine that runs the full installation: prepare your input parameters locally, run the tracking on the remote machine, then validate and process the output locally.
You can also install PyTorch without a graphics device so that it runs on your CPU. Follow all four steps of Install idtracker.ai, but in step 3 select Compute Platform: CPU on the PyTorch site.
This installation can be useful if you want to track a single animal, or to Track without identities. In these cases the identification algorithms are not used and you won’t notice the lack of a proper GPU. However, if you want to track multiple animals with identification, the neural network algorithms will run very slowly on your CPU, making this installation unusable for large videos.
Update idtracker.ai#
To update idtracker.ai from version 5.x to current version 6.0.14, run (inside the environment):
python -m pip install --upgrade idtrackerai
To update idtracker.ai from version 4.x (or below), you will have to Uninstall the old conda environment and install the new version from scratch as version 4.x used a different Python version.
Uninstall#
To remove everything inside a Conda environment and the environment itself, from outside the environment run:
conda remove -n idtrackerai --all